How to Make Soap With Beef Tallow in 10 Easy Steps
To make soap with beef tallow in 10 easy steps, start by gathering your ingredients and supplies, including high-quality beef tallow, lye, and any additional oils you want to use. Rendering the tallow by slowly melting beef fat is a crucial first step to ensure purity and quality.
Next, prepare a lye solution carefully, following safety guidelines to avoid any hazards. Measure your additional oils precisely to balance the soap’s properties.
Combine the melted tallow and oils, then blend the mixture until you reach trace, which is when it thickens slightly. At this stage, add fragrance or any extras you desire to customize your soap.
Pour the mixture into molds and let the soap cure properly for several weeks. This curing process is essential to develop the soap’s hardness, lather, and safety.
Follow these basics, and you’ll soon discover how each step refines your soap’s quality and safety, resulting in a rich, nourishing bar made with beef tallow.
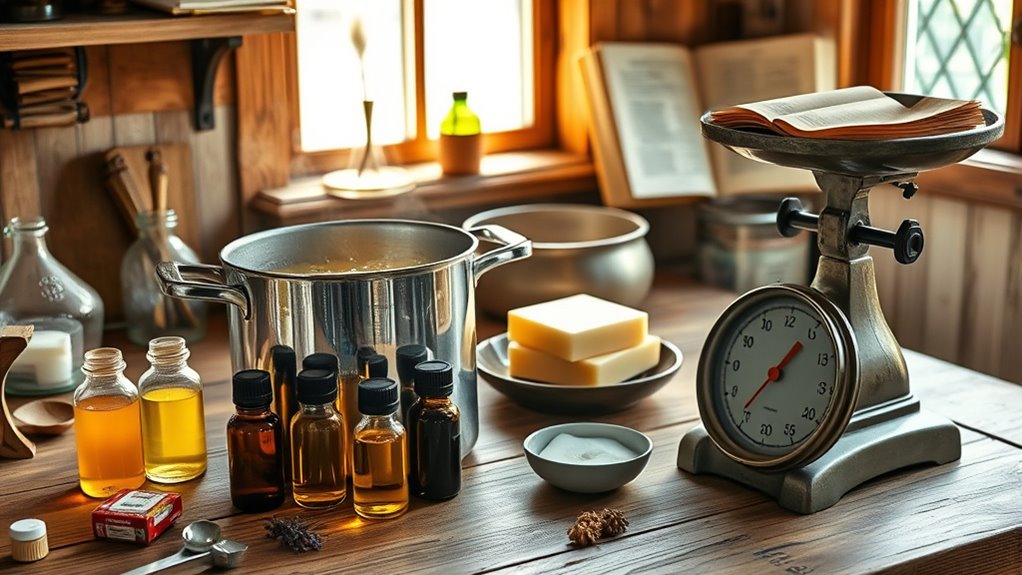
Gather Your Ingredients and Supplies

Before you begin making soap with beef tallow, gather all the necessary ingredients and supplies to guarantee a smooth process. You’ll need beef tallow, lye (sodium hydroxide), and distilled water as your core ingredients.
Gather beef tallow, lye, and distilled water before starting to ensure a smooth soap-making process.
For added benefits, consider essential oils for fragrance and optional additives like oatmeal or dried herbs. Make sure you have safety gear: gloves, goggles, and a well-ventilated workspace.
Equip yourself with a digital kitchen scale for accurate measurements, a heat-resistant container for mixing lye, and a stainless steel or heavy-duty plastic spoon for stirring.
Also, prepare soap molds, parchment paper, and a thermometer to monitor temperatures.
Having everything ready before you start helps avoid mistakes and ensures a safer, more efficient soap-making experience.
Render the Beef Tallow

Once you’ve gathered your ingredients and tools, it’s time to render the beef tallow. Start by cutting the beef fat into small pieces. Place them in a heavy pot over low heat.
Slowly melt the fat, stirring occasionally to avoid burning. As it melts, the solid pieces will separate from the liquid fat. Once fully melted, strain the liquid through cheesecloth to remove any solids.
Let it cool and solidify for use in soap making.
| Step | Action | Tip |
|---|---|---|
| 1 | Cut fat into pieces | Small pieces melt evenly |
| 2 | Heat on low | Avoid high heat to prevent burning |
| 3 | Stir occasionally | Keeps fat from sticking |
| 4 | Strain melted fat | Use cheesecloth |
| 5 | Cool and solidify | Store in a clean container |
Prepare the Lye Solution

Although handling lye requires caution, you’ll find preparing the lye solution straightforward if you follow safety guidelines carefully. First, wear protective gloves, goggles, and work in a well-ventilated area to avoid inhaling fumes.
Measure the lye (sodium hydroxide) precisely using a digital scale. Next, carefully add the lye to cold distilled water, not the other way around, to prevent dangerous splashes and heat spikes. Stir gently with a heat-resistant spoon until the lye fully dissolves.
The solution will heat up quickly; let it cool to around 100–110°F before mixing with oils. Remember to never use aluminum containers, as lye reacts with them.
Measure and Melt Additional Oils
After preparing the lye solution and letting it cool, you’ll need to measure and melt the additional oils that will combine with your beef tallow.
Use a kitchen scale to weigh your chosen oils precisely, guaranteeing the soap’s final texture and cleansing properties are balanced.
Common oils include olive, coconut, or castor oil, each adding unique qualities.
Place the measured oils in a heat-safe container or saucepan.
Gently heat them over low to medium heat, stirring occasionally to promote even melting.
Avoid overheating to prevent degrading the oils.
Once the oils are fully melted and clear, remove them from heat.
Let them cool slightly but keep them liquid and ready to mix with the tallow.
This step ensures a smooth blend in your soap-making process.
Combine Tallow and Oils
Before mixing your beef tallow with the melted oils, make sure both are at similar temperatures to guarantee a smooth blend. If one is too hot or cold, it might cause the fats to separate or harden unevenly.
Slowly pour the melted oils into the warm tallow while stirring gently but consistently. Use a heat-safe spatula or whisk to combine them thoroughly, ensuring the mixture is uniform without any visible streaks.
Keep stirring until you achieve a smooth, homogenous texture. This step is vital because a well-combined fat base leads to better saponification and a consistent soap texture.
Once combined, you’re ready to proceed with the next step, mixing your lye solution into the oils.
Mix the Lye Solution With Oils
Once your oils and tallow are well combined and cooled to the right temperature, you’ll carefully add the lye solution to the mixture.
Make sure both are between 95°F and 105°F to prevent separation or a failed batch.
Slowly pour the lye solution into the oils, aiming for the center of the bowl to reduce splashing.
Use a sturdy spoon or spatula to gently stir the mixture at first, blending the two liquids together without whipping air in.
Be cautious with the lye. It’s caustic, so wear gloves and work in a well-ventilated area.
Mixing the lye and oils evenly is vital because it starts the saponification process, turning your ingredients into soap.
Once combined, you’ll be ready for the next step.
Blend Until Trace Is Reached
You’ll want to start blending the mixture gently but steadily after combining the lye solution with the oils. Use an immersion blender in short bursts to avoid overmixing. Your goal is to reach “trace,” a stage where the mixture thickens and leaves a visible trail when dripped over the surface.
Trace indicates the oils and lye are properly emulsified, pivotal for soap quality.
Here’s what to look for as you blend:
| Stage | Description | How to Test |
|---|---|---|
| Thin | Mixture looks watery | Drip falls and blends in |
| Light Trace | Slight thickening | Leaves faint trail |
| Medium Trace | Pudding-like consistency | Trail holds briefly |
| Thick Trace | Thick, almost like custard | Trail stands out clearly |
| Full Trace | Very thick, holds shape | Can pipe or mold easily |
Add Fragrance and Optional Additives
Although the soap mixture has reached trace, it’s important to add fragrance and any optional additives now to guarantee they incorporate evenly without affecting the soap’s texture.
Measure your chosen essential oils or fragrance oils carefully, typically around 0.5 to 1 ounce per pound of soap base, and stir them in gently but thoroughly. This ensures your soap smells just right without overpowering.
If you want to customize your soap further, this is the moment to add colorants, exfoliants like oatmeal or ground coffee, or moisturizing ingredients such as honey or aloe vera.
Be mindful with additives; too much can alter the soap’s consistency or cause separation. Mix everything evenly but avoid over-stirring, which may cause the mixture to thicken prematurely.
Pour Soap Mixture Into Molds
How do you transfer your soap mixture into molds without losing its smooth texture? First, guarantee your molds are clean and dry. Slowly pour the mixture, aiming for the center to avoid splashes. Use a spatula to scrape every bit from the bowl, keeping the mixture intact.
Tap the molds gently to release trapped air bubbles and level the surface.
| Step | Tip | Why It Matters |
|---|---|---|
| Prepare molds | Use silicone or plastic | Easy release after curing |
| Pour mixture | Pour slowly and steadily | Maintains smooth texture |
| Scrape sides | Use a rubber spatula | Minimizes waste |
| Tap molds | Light taps on table | Prevents air bubbles |
| Cover molds | Use plastic wrap | Protects from dust |
Cure the Soap Bars Properly
Once your soap mixture has settled smoothly in the molds, the next step is to cure the soap bars properly. This process lets excess water evaporate, hardening the soap and improving its quality.
Leave the soap in a cool, dry area with good air circulation for about 4 to 6 weeks. Avoid direct sunlight and humidity to prevent softening or discoloration. Turn the bars occasionally to ensure even curing.
Cure soap in a cool, dry place with good airflow; turn bars occasionally for even drying.
Patience is key. The longer the cure, the milder and longer-lasting your soap will be. After curing, test a small piece to check hardness and lather quality.
Proper curing guarantees your beef tallow soap is safe, effective, and ready to use. Don’t rush this step; it’s essential for great soap results.
Frequently Asked Questions
Is Beef Tallow Soap Safe for Sensitive Skin?
Yes, beef tallow soap is generally safe for sensitive skin because it’s moisturizing and gentle. However, you should always patch-test first to avoid irritation, especially if you have allergies or very reactive skin.
How Long Does Beef Tallow Soap Last Once Cured?
Beef tallow soap lasts about 1 to 2 years once cured if stored properly in a cool, dry place. You’ll want to keep it away from moisture and direct sunlight to maintain its quality and scent.
Can I Use Beef Tallow Soap for Washing Hair?
Yes, you can use beef tallow soap for washing hair, but since 70% of people report scalp dryness with traditional soaps, you might want to add moisturizing ingredients. This will help avoid dryness and keep your hair soft and healthy.
What Are the Environmental Benefits of Using Beef Tallow Soap?
You’ll reduce waste by repurposing beef fat, lowering reliance on synthetic chemicals, and cutting down on plastic packaging since tallow soap often comes in minimal or no packaging.
It’s a sustainable, eco-friendly choice you can feel good about.
How Does Beef Tallow Soap Compare to Commercial Soaps?
Think of beef tallow soap as a sturdy oak, natural and nourishing, while commercial soaps often feel like plastic leaves, artificial and fleeting.
You’ll notice tallow soap moisturizes better and avoids harsh chemicals, giving your skin genuine care.
Conclusion
Now that you’ve crafted your own beef tallow soap, you’re holding more than just a bar—you’ve created a little piece of art that cleanses and nourishes. Soap making might seem complex, but with these 10 easy steps, you’ve turned simple ingredients into something extraordinary.
So go ahead, enjoy the fruits of your labor, and let your skin thank you with every wash. After all, isn’t it amazing how something so humble can transform so beautifully? Making soap with beef tallow not only provides a natural, moisturizing cleanse but also connects you to a time-honored tradition of soap crafting.