How Long to Bake Chicken Thighs – Step-by-Step Guide
When you want juicy, tender chicken thighs, knowing exactly how long to bake chicken thighs is key. Whether you’re working with bone-in or boneless pieces, the timing and temperature can make all the difference. You might think it’s straightforward, but a few critical steps can transform your results.
Before you start, it’s worth understanding these nuances—because the last thing you want is dry or undercooked chicken on your plate. Mastering how long to bake chicken thighs step by step ensures perfectly cooked, flavorful meat every time.
Understanding Chicken Thighs: Bone-In Vs Boneless

While bone-in chicken thighs take about 45 minutes to bake at 375°F, boneless ones cook faster, usually in 25 to 30 minutes.
When you choose bone-in chicken thighs, the bone helps retain moisture, keeping the meat juicy and flavorful as it reaches the safe internal temperature of 165°F.
Boneless chicken thighs, including skinless chicken thighs, tend to be leaner and can dry out quickly if overcooked, so you’ll want to watch the baking time closely.
The size and thickness of the thighs also affect cooking time, so it’s important to check the internal temperature to guarantee safety without sacrificing juiciness.
Understanding these differences helps you bake perfectly cooked chicken every time.
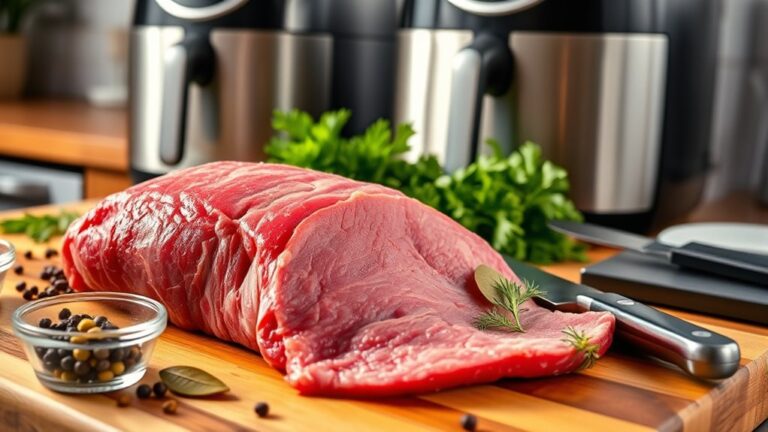
Preparing Chicken Thighs for Baking

Before you bake chicken thighs, you should pat them dry with paper towels to remove excess moisture, which helps achieve a crispier skin.
If you’re using frozen chicken thighs, make sure they thaw completely in the refrigerator for 24 hours to ensure thorough cooking.
Trim any excess skin or fat if you want a leaner dish.
Next, season the chicken thighs generously with your favorite spices or marinade, coating both sides evenly.
Arrange the thighs on a baking sheet, spacing them out for proper heat circulation.
This setup guarantees even cooking at your chosen oven temperature.
Proper preparation like this sets the stage for delicious, perfectly baked chicken thighs every time.
Choosing the Right Oven Temperature

When you choose the right oven temperature, you control the balance between cooking time and the texture of your chicken thighs.
For a crispy skin with shorter baking time, set your oven to 425°F, which typically takes about 35-40 minutes.
If you prefer a balance between tenderness and crispiness, 400°F is a solid oven setting, with a baking time near 40 minutes.
Lower temperatures like 350°F require longer baking time, usually 50-60 minutes, but can yield juicier meat.
Whatever temperature guidelines you follow, always check the internal temperature with a meat thermometer to ensure it reaches 165°F for safety.
Recommended Baking Times for Different Sizes
Since chicken thighs vary in size, you’ll need to adjust baking times accordingly to guarantee they cook through properly. The oven temperature and whether the thighs are bone-in or boneless directly affect your cooking time. Here’s a quick guide to help you:
- Small boneless chicken thighs (4-6 oz) bake at 375°F for 35-40 minutes.
- Larger boneless thighs (over 6 oz) need 45-50 minutes at the same oven temperature.
- Bone-in thighs require an extra 5-10 minutes compared to boneless ones at 375°F.
- For crispy skin, bake at 425°F for 35-40 minutes, ensuring the internal temperature reaches 165°F.
Adjusting baking times based on these factors will help you cook chicken thighs perfectly every time.
Using a Meat Thermometer for Perfect Doneness
Adjusting baking times based on the size and type of chicken thighs helps, but the most reliable way to guarantee perfect doneness is by using a meat thermometer.
Insert an instant-read meat thermometer into the thickest part of the thigh, avoiding the bone, to check the internal temperature accurately.
The USDA recommends a minimum of 165°F for food safety, but for juicier, more tender thighs, aim between 180-190°F.
Regularly monitoring the temperature during baking chicken thighs ensures you adjust for variations in oven temperature and avoid overcooking.
Once your thermometer reads at least 165°F, remove the chicken from the oven and let it rest.
This step allows the juices to redistribute, delivering perfectly cooked, safe, and delicious chicken every time.
Tips for Achieving Crispy Skin
To get irresistibly crispy skin on your chicken thighs, you’ll want to bake them at a high temperature like 425°F, which helps render the fat and create a golden, crunchy exterior.
Here are four tips to perfect your oven-baked chicken thighs:
- Pat dry the chicken thoroughly with paper towels to remove moisture that prevents crisping.
- Lightly coat the skin with oil before baking to enhance browning and crispiness.
- Use a wire rack in your baking dish to allow hot air circulation for even, crispy skin.
- Finish with 2-3 minutes of broiling to boost the skin’s crispiness without overcooking the meat. Following these steps at the right baking temperature guarantees deliciously crispy skin every time.
How to Know When Chicken Thighs Are Fully Cooked
Although the perfect bake time varies, you can tell your chicken thighs are fully cooked when the internal temperature hits 165°F, guaranteeing safety. While aiming for 180-190°F will give you tender, juicy meat.
To check doneness, use an instant-read thermometer inserted into the thickest part of the thigh, avoiding the bone. The meat should no longer show any pink, especially near the bone, which indicates it’s safe to eat.
Use an instant-read thermometer in the thickest part, avoiding the bone, ensuring no pink remains for safety.
Another sign is that the juices run clear when you pierce the chicken with a fork or knife. These indicators combined help you confirm the chicken is fully cooked.
After baking, allow the thighs to rest briefly, which further ensures the doneness and enhances juiciness.
Resting Time After Baking
When you take chicken thighs out of the oven, letting them rest for at least 5 to 10 minutes allows the juices to redistribute evenly throughout the meat. This resting time is vital for juicy, flavorful baked chicken thighs.
Here’s why you should never skip resting chicken:
- Juice redistribution ensures every bite is moist and tender.
- Cutting too soon causes juices to spill out, drying the meat.
- Tenting with foil keeps the chicken warm without losing moisture.
- Resting is especially important if you cooked the thighs to a higher internal temperature (180-190°F) for extra tenderness.
Common Mistakes to Avoid When Baking Chicken Thighs
If you want perfectly baked chicken thighs, you need to avoid common mistakes like baking at too high a temperature or skipping the essential step of measuring internal temperature accurately.
Baking at 425°F or higher for too long can burn the skin while leaving the meat undercooked.
Don’t rely solely on hitting 165°F. Overcooking past 190°F dries out the meat, ruining its juiciness.
Use a reliable thermometer to check internal temperature and prevent both undercooking and overcooking.
Also, avoid placing thighs directly on the pan, as juices collect and create soggy skin; use a rack for even cooking.
Finally, always let the chicken rest 5-10 minutes after baking to allow the juices to redistribute, ensuring tender, moist thighs every time.

Storing and Reheating Baked Chicken Thighs
Properly storing and reheating your baked chicken thighs helps maintain their flavor and texture long after cooking. To keep your leftover chicken fresh and tasty, follow these steps:
- Cool the chicken to room temperature before placing it in an airtight container to avoid moisture loss.
- Store the chicken in the refrigerator for up to four days or freeze for up to one month for longer storage.
- When reheating, use medium power in the microwave for 1-2 minutes or heat in a 350°F oven for 10-15 minutes, covered with foil to retain moisture.
- Make certain the chicken reaches an internal temperature of 165°F to guarantee it’s safely reheated.
Following these tips preserves moisture and flavor every time you reheat your baked chicken thighs.
Frequently Asked Questions
How Long Does It Take to Fully Bake Chicken Thighs?
You’ll need about 35 to 45 minutes to fully bake chicken thighs at 400°F. Thicker pieces might take longer, so use a meat thermometer to verify for 165°F to ensure they’re safely cooked.
Is It Better to Bake Chicken Thighs at 350 or 400?
You’ll want to bake chicken thighs at 400°F if you crave crispy skin and shorter cooking time.
Choose 350°F for more tender, evenly cooked meat, though the skin won’t be as crispy.
How Long Does It Take to Cook Chicken Thighs and Legs at 400 Degrees?
You’ll want to bake chicken thighs and legs at 400 degrees for about 35 to 45 minutes unless you prefer raw poultry roulette.
Just make sure the internal temperature hits 165°F for safe, tasty results.
Conclusion
Now that you know how to bake chicken thighs perfectly, imagine pulling golden, crispy thighs from your oven, their aroma filling the kitchen. With the right temperature, timing, and a quick rest, you’ll enjoy juicy, tender meat every time.
Trust your thermometer and avoid common pitfalls to make each bite a crispy, flavorful delight. Baking chicken thighs isn’t just cooking—it’s creating a mouthwatering experience you’ll want to savor again and again.
By following these steps on how long to bake chicken thighs, you ensure delicious results every time. Perfectly baked chicken thighs are crispy on the outside and juicy on the inside, making them a favorite for any meal.