How Do You Put Studs in the Wall: A Step-by-Step Guide
Have you ever wanted to hang a heavy picture or mount a TV, only to wonder, “How do you put studs in the wall?” You’re not alone.
Many people find themselves puzzled by the process, unsure of where to start or what tools they need. But don’t worry—you’re about to discover how simple it can be. Imagine confidently knowing your wall hangings will stay secure, giving you peace of mind and transforming your space into something you love.
With a few straightforward steps, you can master this essential DIY skill. Ready to dive in and learn how to safely and effectively put studs in your wall? Let’s get started!
Tools And Materials Needed
Installing studs in the wall requires precise tools and materials. The right equipment ensures safety and accuracy. Knowing what you need saves time and prevents mistakes.
Hammer
A hammer is essential. It drives nails into the wood. Choose a sturdy one for best results.
Measuring Tape
Accurate measurements are crucial. Use a measuring tape to mark spots. Ensure the studs are evenly spaced.
Level
A level ensures the studs are straight. Check the alignment regularly. This keeps your wall stable.
Stud Finder
Locate existing studs with a stud finder. It helps avoid unnecessary holes. This tool is simple and effective.
Saw
A saw cuts wood to size. Ensure it’s sharp for clean cuts. This aids in fitting the studs properly.
Drill
A drill makes holes for screws. Use it for attaching the studs. This tool saves time and effort.
Wood Screws
Wood screws hold the studs. They provide secure attachment. Choose the right size for your project.
Safety Gear
Wear gloves and goggles. Protect yourself from splinters and dust. Safety gear is a must.
Credit: www.homedepot.com
Preparing The Wall
Preparing the wall is crucial before installing studs. It ensures stability and safety in construction. Careful planning and execution of these steps lead to successful wall installation.
Clearing The Workspace
Start by removing all furniture and decorations from the area. This prevents damage and allows easy access to the wall. Ensure the floor is clean and free of debris. A tidy space helps you work efficiently. Gather all necessary tools like measuring tape and a level. Organizing your tools saves time and energy.
Identifying The Wall Type
Determine the material of the wall. Common types include drywall and concrete. Each requires different tools and techniques. Inspect the wall for any existing studs or wiring. Use a stud finder for accurate detection. Avoid drilling into electrical wires for safety. Knowing the wall type helps in choosing the right materials.
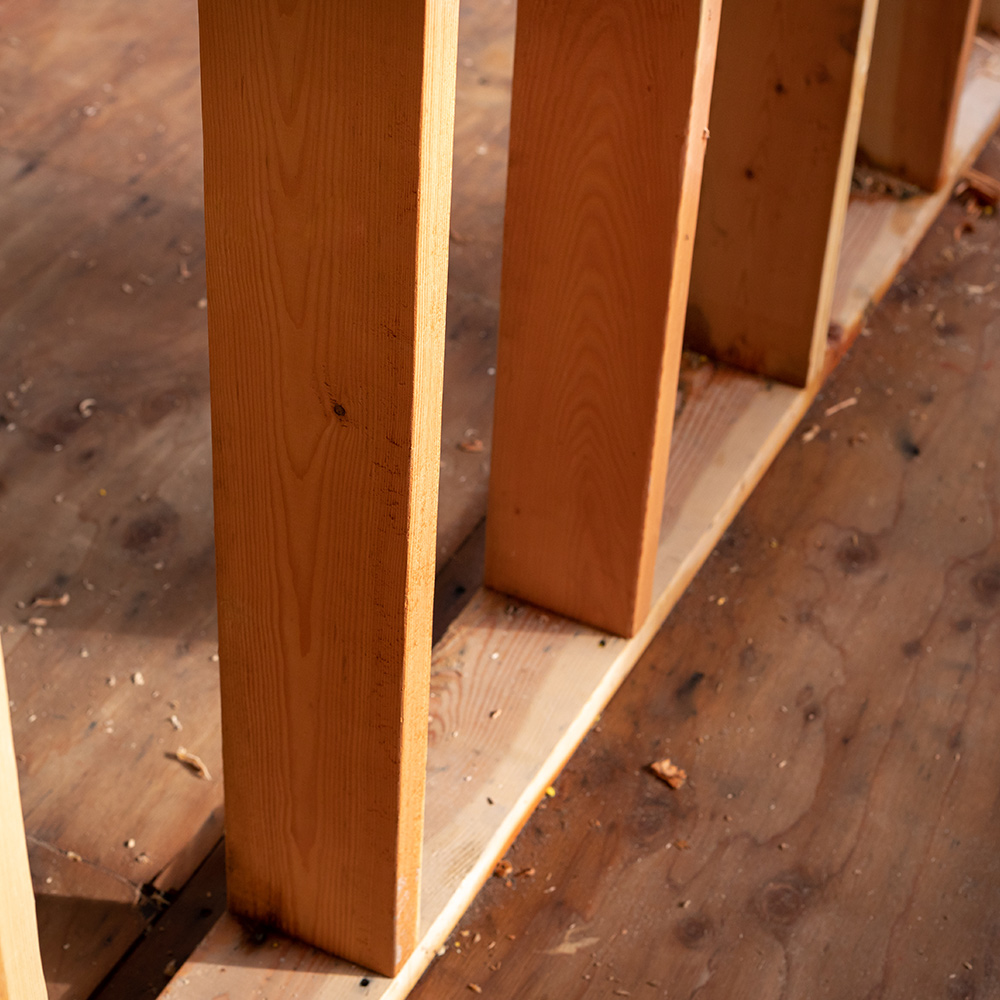
Measuring And Marking
Properly measuring and marking your wall is crucial when putting studs in place. This ensures your structure is strong and supports whatever it needs to hold. Follow these steps to make sure your wall is ready for studs. Let’s dive into the important details of measuring and marking.
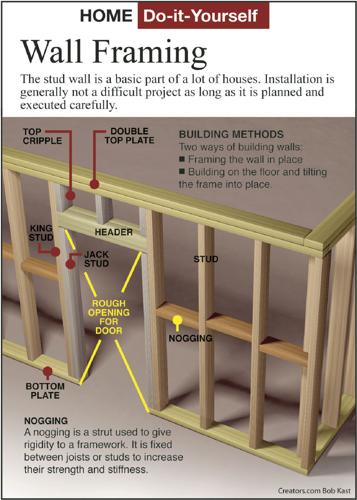
Determining Stud Placement
First, decide where the studs should go. Start by finding the wall’s corners. Measure the length of the wall. Typically, studs are placed 16 inches apart. Use a tape measure for accuracy. Mark these points along the wall. Make sure each mark is level. This creates a guide for your studs.
Marking The Wall
After determining stud placement, begin marking the wall. Use a pencil for clear marks. Start at one corner of the wall. Mark the first stud location. Continue marking every 16 inches. Ensure each mark lines up vertically. Use a level to check your work. This helps maintain a straight line for your studs.
Double-check all your measurements. Accurate markings prevent future mistakes. This careful preparation makes installing studs much easier. Your wall will be ready for the next steps.
Credit: siouxcityjournal.com
Cutting Studs To Size
Cutting studs to size is a crucial step in wall construction. Precise cuts ensure stability and strength. This process demands attention and care. Proper techniques and tools are essential for accurate cuts. Below, learn how to select materials and tools for the job.
Selecting Appropriate Materials
Choose the right wood for your studs. Pine and fir are popular choices. They offer strength and durability. Avoid warped or damaged boards. Inspect each piece for defects. Quality wood makes a sturdy wall.
Using The Right Tools
The saw is your primary tool for cutting. A circular saw works well for straight cuts. Ensure the blade is sharp and clean. Use a measuring tape for precise lengths. Mark the wood with a pencil before cutting. Safety gear is crucial. Wear goggles and gloves to protect yourself.
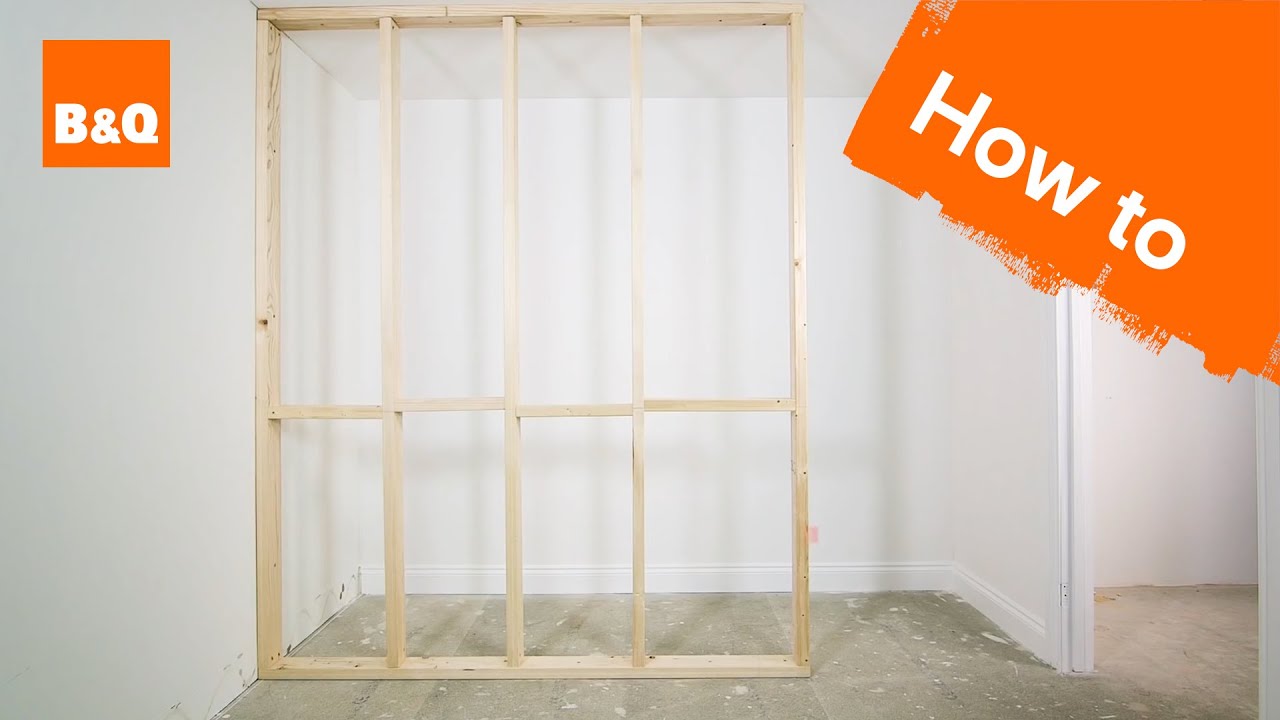
Securing The Studs
Securing the studs is a crucial step in wall construction. Properly installed studs ensure stability and safety for your walls. This section focuses on how to secure studs effectively.
Nailing Vs. Screwing
Choosing between nails and screws is essential for securing studs. Nails are often quicker to install. They are a popular choice for framing. However, screws provide better hold. They are ideal for heavy loads. Screws are less likely to loosen over time.
Nails can be easier to remove. This makes adjustments simpler. Yet, screws offer precision. They ensure a tighter fit. Consider the wall’s purpose when choosing between nails and screws.
Ensuring Stability
Proper stud placement guarantees wall stability. Measure the space carefully. Ensure studs are evenly spaced. Standard spacing is 16 inches apart. This supports drywall effectively.
Use a level to check alignment. Ensure studs are vertical. A crooked stud weakens the wall. Secure each stud firmly. Double-check connections for reliability.
Consider the wall load. Heavy items require reinforced studs. Attach braces if necessary. Reinforcement prevents sagging or damage. Stability ensures a long-lasting wall structure.
Checking Alignment
Ensuring wall studs are properly aligned is essential for stability. Measure and mark the desired positions on the wall. Use a level to check each stud’s alignment before securing it in place.
When it comes to hanging shelves or pictures, or even constructing a new wall, checking alignment is crucial. Misaligned studs can lead to uneven surfaces and structural issues. Ensuring that your studs are perfectly aligned ensures stability and a professional finish.Using A Level
Start by using a level to check the alignment of your studs. A level is a simple tool but an essential one for any DIY project. Place the level vertically against each stud to see if it’s straight. If the bubble is centered, your stud is aligned correctly. If not, adjustments are needed. A level helps avoid visual discrepancies, ensuring everything lines up perfectly.Adjusting As Necessary
If you notice any discrepancies, adjusting your studs is necessary. You might need to tap the stud lightly with a hammer to bring it into alignment. Sometimes, adding a shim can correct slight misalignments. Have you ever installed a shelf, only to have items slide to one side? This is a common issue when studs aren’t properly aligned. Taking the time to adjust ensures everything is level and secure. Have you ever thought about how much a small misalignment could affect your project? Ensuring accurate alignment might take a few extra minutes, but it’s worth it to avoid future headaches. Make sure to regularly check your work as you go along. These small steps ensure your project is as perfect as possible.Finishing Touches
Completing your wall project involves some final steps. These steps ensure everything looks neat and functions well. These finishing touches make your hard work shine. They bring out the true beauty of your efforts.
Cleaning The Area
First, clear away any debris from the site. Dust and small particles gather during construction. Sweep or vacuum these to keep the area clean. Wipe down the walls with a damp cloth. This removes any lingering dust. A clean area highlights the smoothness of your work.
Dispose of any waste responsibly. Use trash bags or bins. A tidy workspace reduces accidents. It also makes the room look more inviting. Remember to wash any tools used. Clean tools last longer and work better next time.
Inspecting The Work
Now, take a step back. Look at the wall from different angles. Ensure all studs are in place. Check if they are straight and level. Use a spirit level for accuracy. Misaligned studs can cause issues later.
Feel the surface for any bumps. Smooth them out with sandpaper. This creates an even finish. Listen for any creaks or odd sounds. These might indicate loose fittings. Tighten any screws if needed. A thorough inspection ensures durability.
Credit: www.youtube.com
Frequently Asked Questions
How Do You Locate Wall Studs?
To locate wall studs, use a stud finder device. Alternatively, look for electrical outlets or light switches, as they are usually mounted on studs. Tapping on the wall and listening for a solid sound can also help identify studs.
What Tools Are Needed To Install Wall Studs?
To install wall studs, you’ll need a stud finder, a drill, screws, a level, and a measuring tape. These tools help ensure accurate placement and secure installation, providing a sturdy framework for your wall.
Can I Install Studs In Plaster Walls?
Yes, you can install studs in plaster walls. Use a stud finder to locate existing studs, then carefully drill through the plaster. Attach new studs to the existing ones for additional support. Ensure all installations are secure to prevent damage.
How Far Apart Should Wall Studs Be Placed?
Wall studs should be placed 16 to 24 inches apart, depending on building codes and wall requirements. This spacing provides structural support and allows for proper installation of drywall or other wall coverings, ensuring stability and durability.
Conclusion
Putting studs in the wall is a simple task. Anyone can do it with the right tools. Just measure carefully. Mark the spots. Then, follow the steps outlined here. Studs support your wall and hold heavy items. So, they’re important.
Patience and precision matter most. Take your time. Double-check your work. Soon, you’ll have sturdy walls. Whether for shelves or decor, you’re ready. Enjoy your new space. It’s rewarding to see your efforts pay off. Keep practicing, and you’ll get even better.
Happy building!