How to Pan Sear Chicken Thighs in 7 Simple Steps
Did you know that chicken thighs retain more moisture than breasts, making them a favorite for juicy meals? Pan searing chicken thighs is a fantastic cooking technique that helps you lock in flavor and achieve a crispy, golden crust. If you’ve ever struggled with soggy or unevenly cooked chicken, mastering the pan sear technique can change everything.
By following a few straightforward steps, you’ll achieve a crispy, flavorful crust and tender interior every time. Let’s explore how simple adjustments in preparation and cooking can elevate your chicken thighs to restaurant-quality results. Pan searing chicken thighs is easier than you think and perfect for a quick, delicious dinner.
Selecting the Best Chicken Thighs for Pan Searing

When selecting chicken thighs for pan searing, choose boneless skinless chicken thighs to speed up cooking and make handling easier.
Look for fresh thighs with a pink color, avoiding any signs of discoloration or sliminess to guarantee quality and safety.
Choose fresh, pink chicken thighs and avoid discoloration or sliminess for the best quality and safety.
Select pieces that have even skin and minimal fat, which helps achieve uniform browning and a crispy texture.
It’s important to pick thighs that are uniform in size so they cook evenly and deliver consistent results.
Before cooking, pat dry the chicken thoroughly with paper towels; removing excess moisture prevents steaming and promotes a crisp sear.
Preparing and Seasoning the Chicken Thighs

After selecting the best chicken thighs and drying them thoroughly, the next step is to prepare and season them properly. Use boneless, skinless chicken thighs and pat dry with paper towels to guarantee an even coating of the dry rub.
Mix salt, garlic powder, smoked paprika, onion powder, parsley, oregano, and pepper for seasoning. Press the spices gently into the meat so they stick during cooking.
For the best flavor, season at least 30 minutes before cooking to let the spices infuse deeply.
| Step | Description |
|---|---|
| Pat Dry | Remove moisture for better sear |
| Dry Rub | Mix and apply spices evenly |
| Press Spices | Help spices adhere to chicken |
| Seasoning Time | At least 30 min to infuse flavor |
Heating the Skillet and Choosing the Right Oil

A hot skillet is essential for achieving a perfect sear on your chicken thighs. Start by preheating your skillet over medium-high heat for 2-3 minutes, ensuring it’s hot enough for searing.
Preheat your skillet over medium-high heat for 2-3 minutes to get the perfect sear on chicken thighs.
Next, choose an oil with a high smoke point like avocado, canola, or grapeseed oil to handle the high heat without burning. Pour in 2-3 tablespoons to evenly coat the skillet’s bottom, creating a barrier that promotes browning.
Wait until the oil shimmers or just begins to smoke before adding your chicken. This signals the skillet is at the right temperature for proper heat transfer.
Adding chicken too early can cause sticking and ruin the crust you’re aiming for. Mastering this step sets you up for a beautifully browned, crispy sear.
Achieving the Perfect Sear on Skin-Side Down
Although it might be tempting to move the chicken right away, you’ll get the best crispy skin by placing the thighs skin-side down in the hot skillet and letting them cook undisturbed for 7-8 minutes.
Begin with a preheated skillet heated to the ideal sear temperature of about 375°F (190°C). Pat your chicken thighs dry to remove moisture, ensuring a golden crust forms.
When you place them skin-side down, apply gentle pressure with a spatula or tongs for proper contact with the pan.
Resist flipping until the skin naturally releases from the pan, signaling the crispy skin is ready.
This method of pan searing guarantees a perfectly crisp, flavorful exterior, making your chicken thighs irresistibly delicious.
Flipping and Cooking the Chicken Thighs Through
Once the skin naturally releases from the pan and reveals a golden-brown crust, it’s time to flip the chicken thighs carefully. Use tongs or a spatula to lift the edge gently, ensuring the crust is perfect before you flip.
Flip gently to keep the skin intact and sear the other side for 8-12 minutes. Cook until the internal temperature reaches 165°F for even doneness.
After cooking, let the chicken rest for 5 minutes to allow juice redistribution, enhancing tenderness and flavor.
| Step | Tips |
|---|---|
| Check crust | Look for golden-brown color |
| Flip | Use tongs, flip gently |
| Cook second side | 8-12 minutes |
| Internal temp | 165°F for safety and doneness |
| Resting | 5 minutes for juice redistribution |
Creating a Simple Pan Sauce to Enhance Flavor
While the chicken rests, you can elevate its flavor by creating a simple pan sauce. Start by deglazing the pan with broth, wine, or lemon juice, scraping up the brown bits stuck to the bottom. These bits concentrate flavor, forming the sauce’s base.
Elevate your chicken’s flavor by deglazing the pan, capturing those flavorful brown bits for a rich sauce base.
Simmer the liquid to reduce it by half, intensifying the taste. Add butter, garlic, and herbs during this process to enrich aroma and richness.
If you want a thicker texture, incorporate a slurry of cornstarch or flour for thickening.
Keep an eye on the sauce’s consistency and flavor, adjusting as needed to concentrate the taste perfectly. This pan sauce will complement your chicken thighs beautifully, adding depth without overshadowing the seared meat’s natural juiciness.
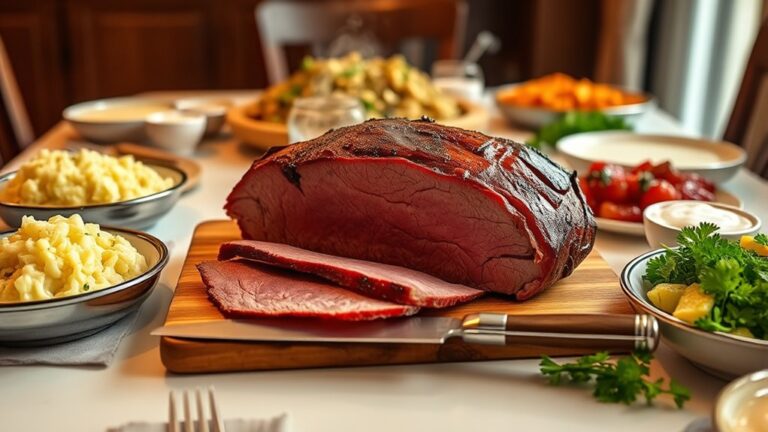
Resting and Serving Your Pan Seared Chicken Thighs
After cooking, let your chicken thighs rest for at least five minutes to allow the juices to redistribute. This ensures each bite stays juicy and flavorful. During the resting period, cover with foil loosely to keep warmth while letting steam escape.
Resting time is key to preserving juiciness and preventing moisture loss. When ready, slice against the grain on a clean board for tender, perfectly juicy pieces. Serve immediately to enjoy the full flavor.
| Resting Time | Juiciness | Serving Tips |
|---|---|---|
| 5+ minutes | Maximum | Cover with foil |
| Essential | Preserved | Slice against grain |
| Helps rest | Tender | Serve fresh |
Frequently Asked Questions
How Do You Pan Sear Chicken Thighs?
You heat oil in a skillet, pat chicken thighs dry, season them, and place skin-side down. Cook until golden, flip, and cook through.
Rest the thighs before serving to keep them juicy and flavorful.
How Do You Sear Chicken in a Pan?
Did you know searing locks in flavor by creating a Maillard crust? To sear chicken, heat oil till shimmering, dry the meat, place it skin-side down, and cook undisturbed until golden brown and crispy.
Should You Sear Chicken Thighs Skin Side Up?
No, you shouldn’t sear chicken thighs skin side up first. You’ll get crispy, golden skin by starting skin side down, allowing fat to render and the skin to crisp before flipping for even cooking.
What’s the Best Way to Cook Chicken Thighs?
You’ll want to treat chicken thighs like treasure. Sear them in hot oil until golden, then cook through gently.
This locks in juicy, tender magic while creating a crispy, flavorful crust you can’t resist.
Conclusion
Now that you’ve mastered the art of pan searing chicken thighs, you’re ready to turn your kitchen into a sizzling stage. With crispy, golden skin and juicy meat, each bite will be a standing ovation for your skills. Remember, patience and proper seasoning are your best co-stars.
Let the chicken rest like a performer catching their breath before the final curtain call. Enjoy your delicious creation—it’s a recipe that’s truly music to your taste buds! Perfect pan seared chicken thighs combine flavor, texture, and technique, making every meal a five-star experience.